

To securely import PST to Office 365 an advanced and upgraded tool is a must. There are several factors that are initiating to import PST to Office 365. Office 365 is a cloud-based email application that allows working from anywhere and offers user-oriented services like Share point, Skype for business, Microsoft Planner, Hosted Exchange Server, etc. PST (Personal Storage Table) is Outlook’s data storage file.
Why Import PST to Office 365:
Change for the better is always good. Office 365 offers a lot to the users in a single move and because of which all are looking to migrate Outlook to Office 365.
- It is a cloud-based service thus has easy accessibility from anywhere in the presence of connectivity.
- Office 365’s services like hosted Exchange Server, Skype for Business Server, Share Point and Collaboration also attract a large number of users.
- With Office 365 there is no need to update all-time. Users will always be benefitted by the updated version.
- Generally, PST file doesn’t remain centrally managed, by importing those to Office 365 this problem can be solved.
- PST files are not fully safe, there is always a security concern with the PST files while in the Office 365 data is in safe hands of Microsoft.
Download a trial version of Shoviv Import PST to Office 365 to know in a better way.
How to Import Securely?
Data is an important asset for everybody and no one ever wish to risk the data so to import PST to Office 365 securely, a highly advanced professional way is a must. To export PST to Office 365 some manual ways like Using Network Upload method, Using Microsoft Office 365 Import Service are also available but they have a list of drawbacks hence never recommended. The major risk with manual method is data loss.
Best Procedure to Export PST to Office 365:
To migrate Outlook to Office 365 the best procedure is to go with the professional third-party tool. Shoviv PST to Office 365 migration tool is the best-suited software for this. The software is an upgraded solution to export PST to Office 365, it is built with the advanced algorithm to facilitate the best working experience to users. The software offers all the looked for features like:
- The Software proficiently exports multiple numbers of PST files to Office 365, Live Exchange and Outlook PST with no restriction on size limit.
- The Software facilitates to Add and Recover OST /PST Files (corrupted or healthy) and repair multiple PST files.
- Shoviv PST to Office 365 Migration Tool supports all the versions of MS Outlook.
- The advanced algorithm of the software prevents duplicity of the items while migrating from PST to Office 365.
- The Software also has a preview option which allows you to preview the damaged and deleted PST files, once the recovery completes.
- Shoviv PST to Office 365 Migration Tool properly maintains the data integrity and hierarchy of the folder.
How does it work?
The working of the Software is very simple and straight. As Software is built with the user-friendly GUI thus running software is easy as pie. Below are the steps:
Step 1: Install and launch the Software.
Step 2: Click the Add Source button to add PST Files that you want to import, the button is at the left of Ribbon Bar. 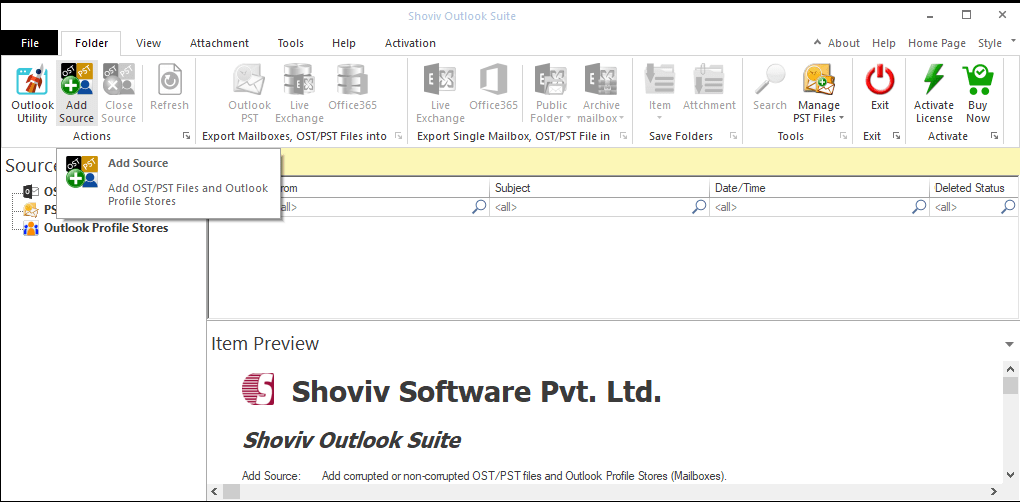
Step3: A dialog box will appear and will ask to add Source type. For here, click the Healthy PST Files. Add, Remove, Remove All, Search options are given for this. Click the Next. 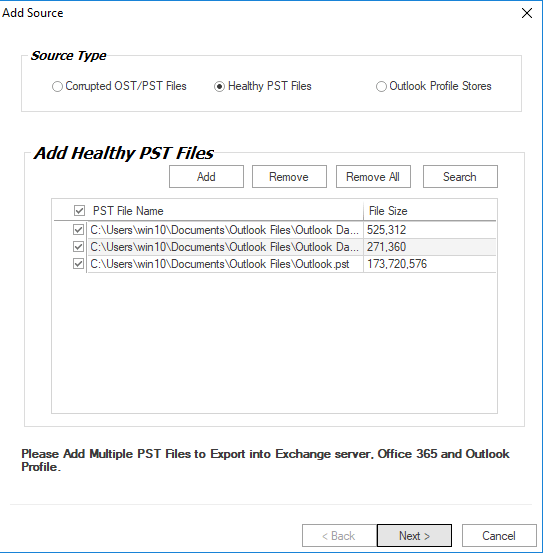
Step 4: Now, at the Source list user can see the added source items. To see the content within the folder, the user can also expand the folder by making a right-click. Click on the Export mailboxes OST/PST files into the Office 365 button of ribbon bar or just make a right-click on the PST files and Select multiple PST files into Office 365 mailboxes. 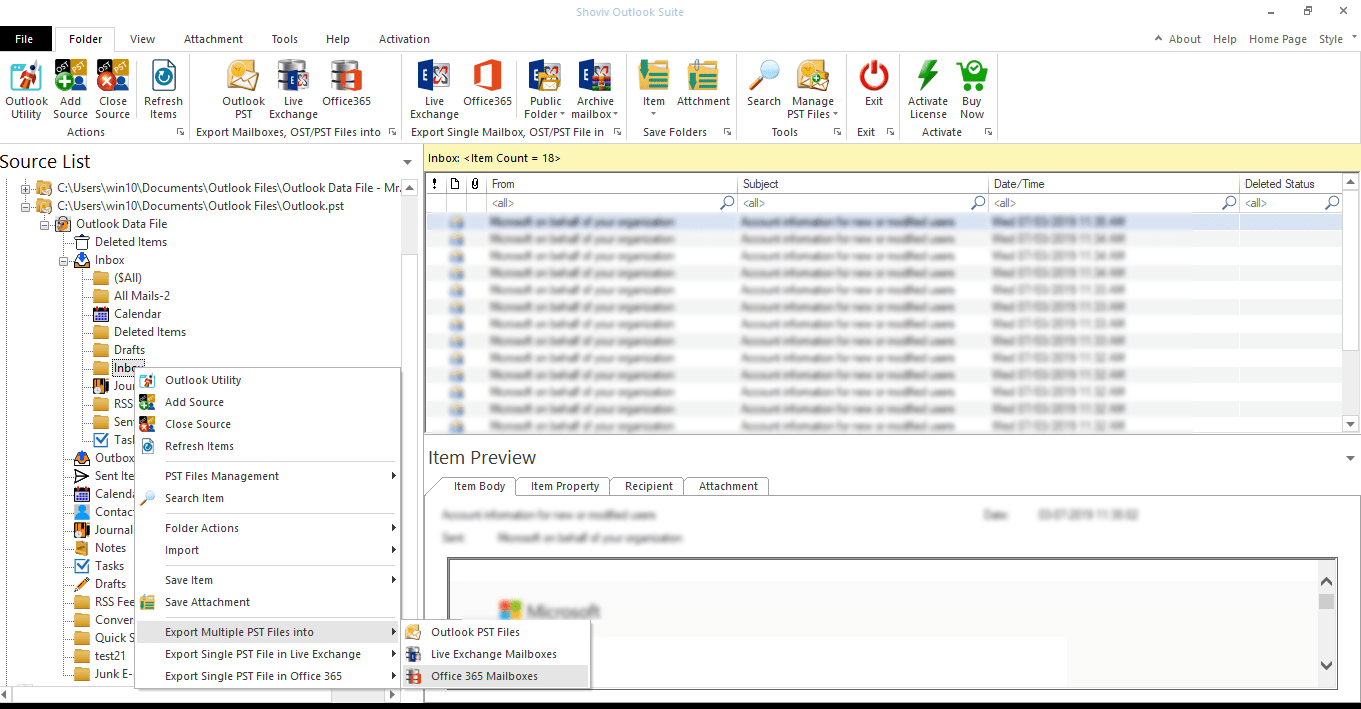
Step 5: A wizard will appear and ask for the check/uncheck subfolder. Check the subfolders and click on the Next. 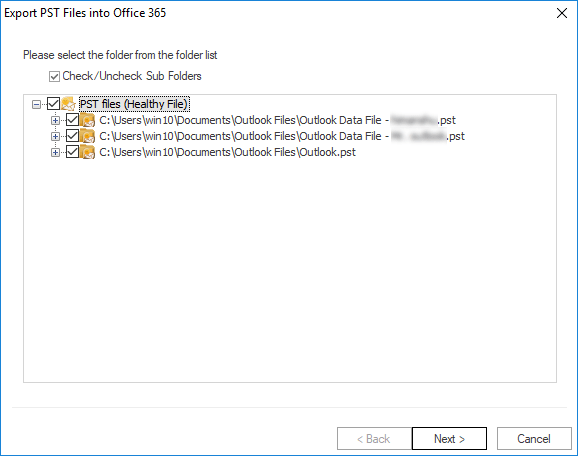
Step 6: Here, an option to Map Mailbox and Validate Target can be seen. For mapping, check the PST file and map with the target Office 365 mailbox. Validating is not a mandatory thing, subject of necessity. Click the Next. 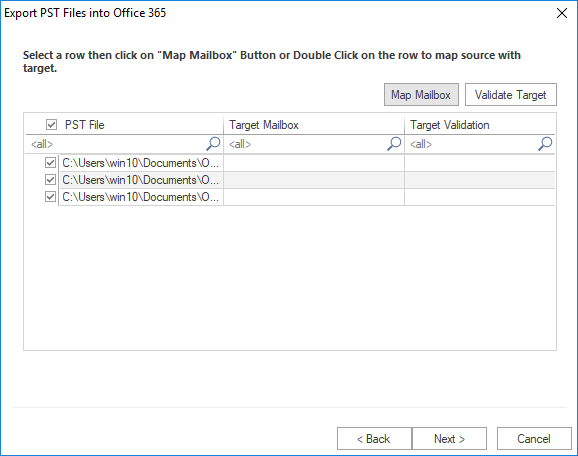

Step 7: Now the filter page will appear. Apply the filter based on Process Message Class and Process Item Date as per the requirement. Click on the Next. 
Step 8: Now PST files will start importing to Office 365. After completing the import, a message “Process completed successfully” will display, click Ok. Here option to save the report is also given, click Save Report button to save the report. When all is done, click on the Finish button. 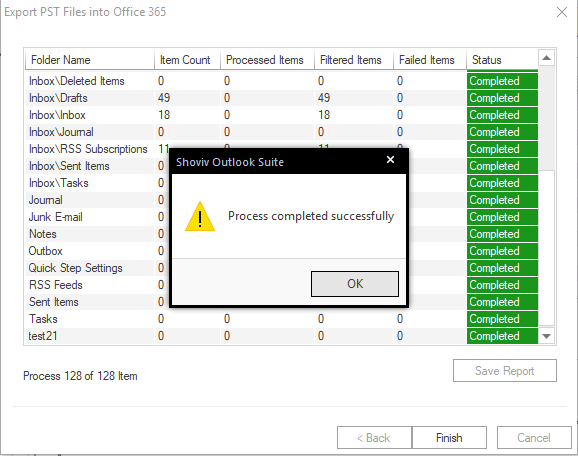
Wrapping up:
Features like all-time accessibility, User-oriented services, and Security etcetera are initiating a number of users to import PST to Office 365. For this, a secure way is a must and thus Third-party tool is required. The manual way of doing this is full of risks and hurdles. To upload PST to Office 365, Shoviv PST to Office 365 migration tool is a picture-perfect tool with an advanced algorithm and user-centric features. To check the working and features of this software, a free demo/trial version of the software is also available which allows migration of the first 25 items per folder.


