

To Import PST to Office 365, a large number of users are looking for a perfect way. MS Office 365 is offering many user-oriented services such as Skype for businesses, Hosted Exchange Server, Microsoft Planner, SharePoint et cetera to which users are attracting.
Download a trial version of Shoviv PST to Office 365 to know in a better way.
Why Import PST to Office 365:
- Being a cloud-based service Office 365 allows working from anywhere in the presence of an internet connection. Accessibility is an important feature.
- A big issue with PST files is, they are not centrally managed, as a result, no way to confirm how many, where they are, and to whom they belong to.
- There are security concerns with the PST files, even the password-protected PST’s are not fully safe while in Office 365 there is no need to worry about the data security; Microsoft itself taking care of the data.
- Features like Collaboration, Service such as Enterprise Social Networking, Yammer is also attracting a lot of users.
- There is no need to upgrade Office 365 all-time, as a result, users will always be benefitted by the latest version of Office 365 with no additional hidden charges.
Ways to import:
To Import PST to Office 365, we have various ways including manual methods as well as Professional methods. Manual Methods are available free of cost but not free from drawbacks. Below we will discuss both methods.
Manual Method:
- Using Microsoft Office 365 Import Service:
Step 1: Firstly, Go to the File tab and click on Open and then on Import.
Step 2: Secondly, click on the “Import from another program or file” in the Import and Export Wizard.
Step3: Make a click on Outlook Data File (.pst) and click on the next.
Step 4: Now set the option for importing the items or you can remain the default setting unchanged.
Step 5: Click on the Finish.
- Using Network Upload Method:
Step 1: Firstly, Install Azure AzCopy and Copy SAS URL
- Download and Install the AzureAzcopy tool on the system and Copy the SAS URL.
- Follow https://protection.office.com/ and sign in to Office 365 account.
- In Security and Compliance Centre click on the Data governance>>Import.
- Import page will display on the screen, click on Import PST files and then select the +New import Job.
- Give the name to PST import Job and click the Next.
- From the Choose import job type page, choose the upload your data option and click on the Next.
- The import data page will display on the screen, copy the secure storage key, and download the Azure Azcopy tool after that a pop window appears on the screen.
- Click run to Install AzCopy.
Step 2:
- Open the Command Prompt.
- Open the directory where the Azure AzCopy tool is installed.
- Run the below-given command.
AzCopy.exe.Source :< Location of PST Files>/Dest :< SASURL>N :< Log file location>/Y
By this command, a message will display informing the PST file upload in progress and after that, a final status will show the total numbers of files uploaded to Azure Storage location.
Step 3: Create the PSTB import Map file
After Uploading the PST file to Azure Storage Location, create a CSV file to specify the user mailboxes where the PST file will import. This CSV file will be used after creating a PST import job.
- Download a sample of the PST import mapping files.
- After that save the CSV file on the System and using Microsoft Excel to edit the file as per requirements.
Step 4: Create PST Import job in Office 365
- After creating a mapping file, create a PST import job in Office 365. For importing the PST import job, follow the same procedure similarly as of Step 1.
- Import data page will display, check the option “I’m done uploading my files and I have access to the mapping files”. Click the Next.
- In the next wizard, upload the CSV file that was created in step 3. After uploading the CSV file, click Validate to verify the file for checking any error. After validating, click on the Save button to submit the job and then click on the close.
Step 5:Filter the data
Before Going to Export PST to Office 365, users can apply the filter if don’t want to import the whole data.
- Go to the Import job page and click on ready to Import to Office 365.
- A page with PST files’ details will appear, click on the Import to Office 365 on the page.
- Filter wizard will come, select the option “Yes, I want to filter it before importing”.
- Refresh to update the status of the Import Job.
- After completing the import process, the job status will change to complete.
By the above all steps, the process to upload PST to Office 365 completes. You can check files by opening the Office 365 account.
Check Out our latest arrival on https://www.shoviv.com/blog/import-pst-to-office-365/
Drawbacks of Manual Methods:
- The manual way to export PST to Office 365 is very tedious and time-consuming.
- During PST to Office 365 if the process fails then in the next attempt the duplicity will appear.
- There is always a chance of human error consequently a minute mistake can lead to severe data loss.
- The technical expertise is required to export PST to Office 365 in a manual way.
- When to upload PST to Office 365 on a large scale, the manual method doesn’t come in handy.
A professional way to import:
To import PST to Office 365 effortlessly, a third-party tool is required. To migrate Outlook to Office 365 proficiently Shoviv PST to Office 365 migration tool is a perfect solution. The tool comes with the user-oriented features as well as provides facilities to users like:
- The tool repairs damaged and corrupted PST files and save to new PST and export to Office 365.
- Shoviv PST to Office 365 Migration Tool swiftly exports large and multiple PST files to Office 365 in an instant.
- The software supports all the versions of MS Outlook for example Outlook 2013, Outlook 2016 and Outlook 2019, etc.
- The software certainly maintains the hierarchy of the folders and integrity of data.
- It also allows exporting PST files to live Exchange.
- Moreover, the software offers to preview PST files once the recovery of damaged and deleted PST files is done.
How does it Work?
There are simple steps to run Shoviv PST to Office 365 migration tool. The software comes with a user-friendly GUI so any user can easily perform the task in simple steps.
Step 1: Firstly, Install and launch the Software.
Step 2: Make a click on the Add Source button of Ribbon Bar to add the PST file that you want to import in Office 365. 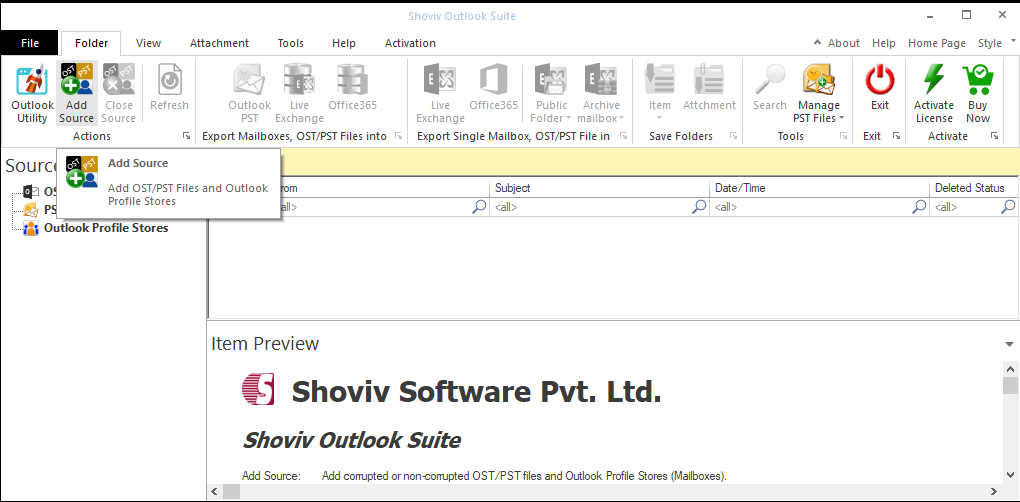
Step3: A dialog box opens and asks to add PST file. Add, Search, Remove as well as Remove all options are given, use as per the need. Check the PST files and click the Next. 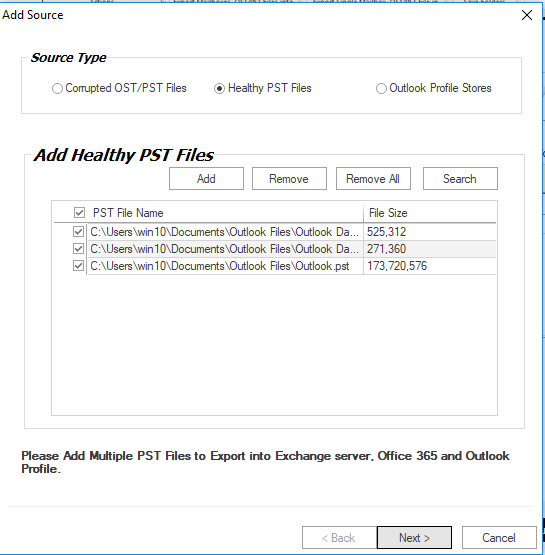
Step 4: Now you can view added source items in the Source list. After that choose the multiple mailboxes into Office 365 button from the ribbon bar. Or just make a right-click on PST Files at the source list. Select the Export Multiple PST files into Office 365 Mailboxes. 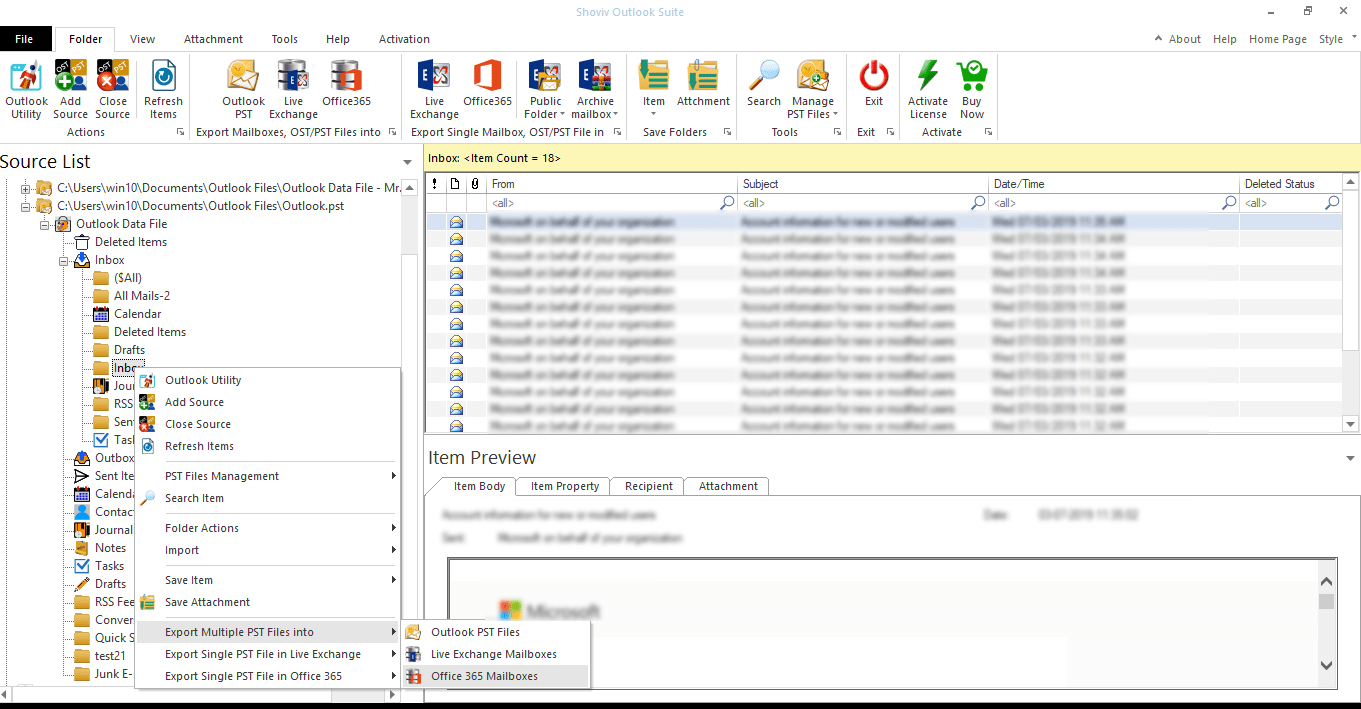
Step 5: This page asks to Check/Uncheck the subfolder. Check the PST files and click on the Next. 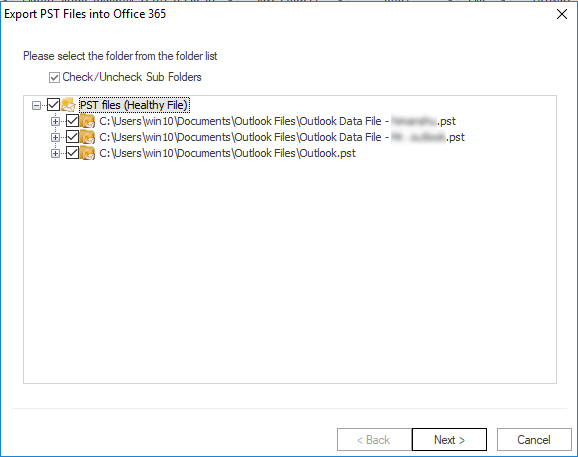
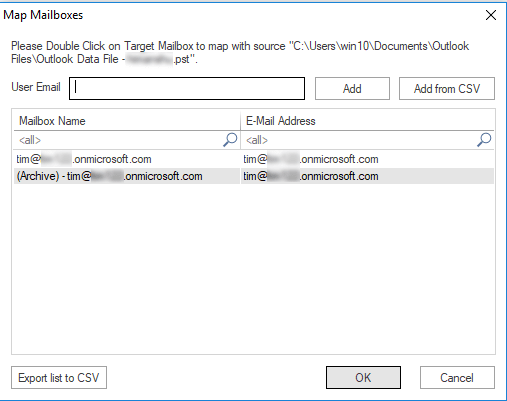
Step 6: Here, options to Map Mailbox and Validate Target are given. To map the mailbox, check the PST file and map with the target Office 365 mailbox. Click Ok after mapping. Validating is not mandatory, subject of need. Click Next. 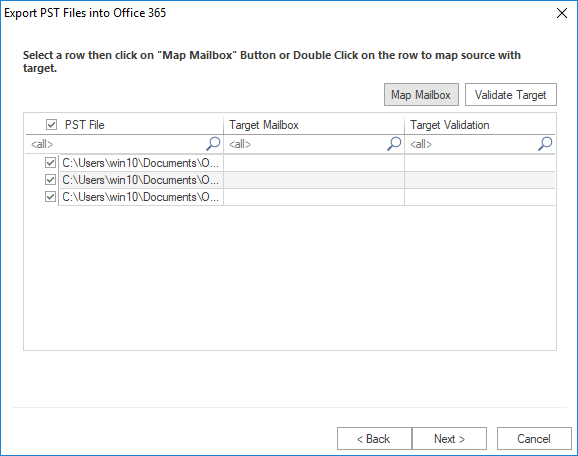
Step 7: Now the user will prompt to filter page, here the user can apply a filter based on Process message Class and Process Item Date. Use as per requirement and click on Next. 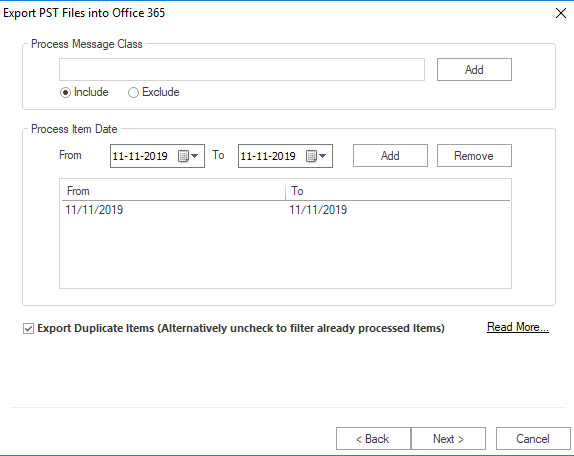
Step 8: Now the PST file starts importing. After the completion of the process, a message “Process Completed Successfully” will appear, click Ok. Users can also save the report by clicking on the Save Report button. Click on the Finish at the end. 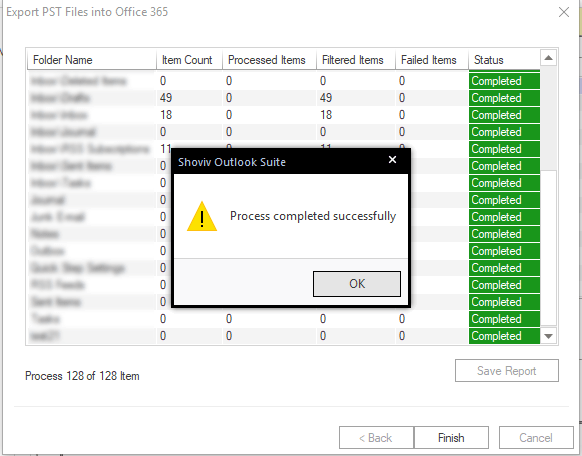
Final Words:
To Migrate PST to Office 365 many users are looking for an effortless way. Office 365 has a variety of features because of which users are attracting. To import PST to Office 365 there are manual ways like Microsoft Office 365 import service, Network upload method but they all have drawbacks and limitations. In conclusion, we can say Going manually is a risk and tedious way. On the other hand, Shoviv software comes with a highly advanced algorithm and user-oriented features. To check its working a free demo/trial version of the software is also available however it allows migration of the first 50 items per folder.


